How to hang things on brick differs from hanging things on drywall or plaster. Today we will give you different methods and instructions for hanging things on brick, including making holes (invasive) and avoiding holes (noninvasive) techniques and products.
Hanging artwork, photographs, or even functional items like shelves on brick walls can add charm and function to any space. Whether it’s the rugged allure of an interior brick accent wall or the sturdy exterior facade of a home, the texture and color of brick can serve as a beautiful backdrop. However, the very features that make brick so visually appealing—its hardness and irregular surface—also present unique challenges when it comes to hanging things.
Unlike drywall or plaster, brick walls require specific tools, techniques, and considerations, especially when preserving the integrity of the brick is a priority. This is particularly true for renters or those living in historic homes and lofts where making permanent alterations might be restricted or undesirable. Furthermore, the approach may vary significantly between interior and exterior applications, as outdoor conditions introduce additional factors, such as weather resistance and durability, into the equation.
We’ll explore a range of solutions for hanging things on brick walls, covering both non-invasive methods ideal for temporary or renter-friendly decorating and more permanent solutions that involve altering the brick itself. We’ll also provide tips on repairing and filling any holes for those who wish to move or update their wall decorations, ensuring the brick’s aesthetic and structural integrity remain intact.
Understanding Brick Surfaces
Before discussing the various methods of hanging items on brick walls, it’s important to understand brick as a material and the characteristics of the surfaces you’ll be working with.
Interior vs. Exterior Brick
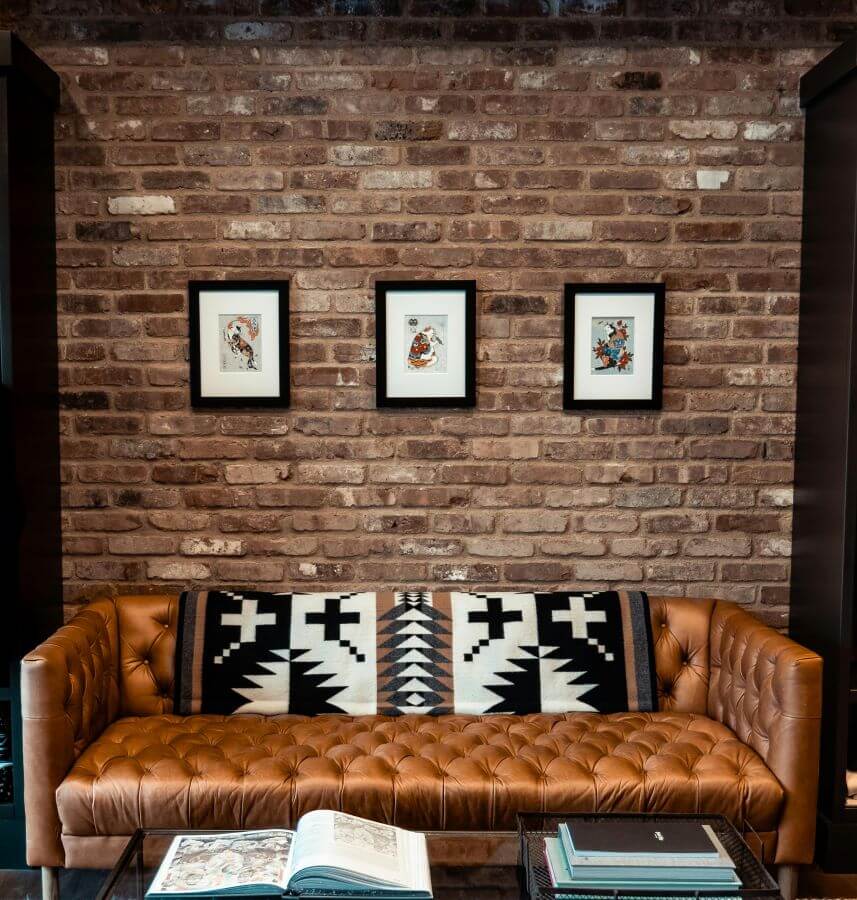
- Interior Brick: Often used as an aesthetic feature in homes and businesses, interior brick can be either structural or a veneer. It’s typically smoother and cleaner than exterior brick, having been shielded from the elements. However, depending on the type of brick and the finishing processes it has undergone, interior brick might still have variations in texture and hardness. When hanging items on interior brick, the main considerations are aesthetic appeal and minimizing damage to the wall.
- Exterior Brick: This type of brick is designed to withstand the outdoor elements, including rain, snow, and extreme temperatures. Exterior brick surfaces are often more textured and may be coated with protective sealants to fend off moisture and erosion. Durability and weather resistance are important factors in the hanging method. Additionally, the potential for brick to become brittle or damaged over time means that any alterations should be made with care.
Characteristics of Brick Walls
- Texture and Porosity: Brick’s rough texture and porous nature can affect how well certain adhesives stick to the surface. These characteristics also determine the type of drill bit and anchors that should be used for creating holes.
- Color Variation: The wide range of brick colors, from deep reds to light tans, can impact the visual aspect of what’s hung on them. Selecting hanging hardware that blends with the color and texture of the brick can help maintain aesthetic harmony.
- Structural Considerations: Understanding whether the brick wall is load-bearing or merely decorative is crucial before attempting to drill or make alterations. This knowledge can prevent potential damage to the wall or the building’s structure.
Environmental Impact on Exterior Brick
Exterior brick walls are subject to the effects of weathering, which can alter their surface and structure over time. Temperature fluctuations, moisture, and sunlight exposure can make exterior bricks more susceptible to damage. When hanging items on exterior brick, be sure to consider these environmental factors to ensure that the chosen method will stand up to the conditions and not cause harm to the wall or the item being hung.
Preparing to Hang on Brick
Proper preparation is essential for successfully hanging objects on brick surfaces, inside or out. This preparation ensures the safety of the individual performing the task and protects the brick wall and the item being hung.
Tools and Materials
Here’s a list of commonly needed supplies:
- Drill: A power drill with a hammer function is ideal for penetrating brick.
- Masonry Drill Bits: These bits are specifically designed to drill through brick and other masonry materials without causing damage.
- Wall Anchors and Screws: Masonry or concrete anchors and screws are necessary for securing items to brick, especially for heavy or valuable objects.
- Tape Measure and Level: Precision is key. A tape measure and level ensure your items are hung at the desired height and alignment.
- Pencil or Marker: For marking drilling spots on the brick.
- Safety Glasses and Gloves: Protect your eyes from brick dust and your hands from sharp edges and debris.
- Adhesive Hooks and Strips: Opt for heavy-duty versions designed for brick or rough surfaces, suitable for renters or temporary installations.
- Brick Clips or Hangers: These are noninvasive tools that can grip the brick without the need for drilling.
Assessing the Wall and Object
- Weight of the Object: Determine the weight of the item you plan to hang. This helps determine the appropriate hardware (anchors, screws, adhesive strips) that can support the weight without failing.
- Condition of the Brick: Examine the brick wall for any signs of damage, wear, or instability. For exterior walls, check for moisture issues or crumbling bricks, which could affect the integrity of the hanging method chosen.
Surface Preparation
- Cleaning the Brick: Ensure the surface area where you plan to hang the item is clean and dry. For adhesive methods, removing dust and grime is especially important for securing a strong bond.
- Measuring and Marking: Use your tape measure and level to carefully plan where the item will hang. Mark the spots lightly with a pencil or marker, considering the item’s hanging mechanism and the brick’s layout.
Safety Precautions
- Wear Protective Gear: Always wear safety glasses to protect your eyes from flying debris and gloves to safeguard your hands during the drilling process or when handling sharp objects.
- Follow Tool Instructions: If using power tools, familiarize yourself with their operation and safety features. Ensure all tools are in good working condition before starting.
Non-Invasive Hanging Solutions (Ideal for Renters)
For renters or anyone hesitant to drill into brick walls, non-invasive hanging methods offer a damage-free alternative for decorating both interior and exterior spaces. These solutions allow for flexibility and ease of installation, with the added benefit of being easily removable.
Adhesive Hooks and Strips
Adhesive products are a go-to for easy, drill-free hanging. However, their effectiveness can vary based on the surface texture and condition of the brick.
- Surface Preparation: To ensure the best adherence, start by cleaning the brick surface with a mild detergent and water, removing any dust or grime. Allow the surface to dry completely before applying the adhesive.
- Application: Follow the manufacturer’s instructions closely when applying adhesive hooks or strips. For rougher surfaces, consider using adhesive products specifically designed for textured or outdoor use. Press firmly against the brick for the amount of time recommended in the instructions to ensure a secure bond.
- Weight Limitations: Adhesive products come with specified weight limits. Selecting a product that can support the weight of the item you intend to hang is essential. Overloading an adhesive hook or strip increases the risk of failure, potentially resulting in damage to both the wall and the item.
Brick Clips
Brick clips offer a sturdy and reliable way to hang items on brick without the need for adhesive or drilling. They are especially useful for both interior and exterior applications due to their simple yet effective design:
- How They Work: Brick clips latch onto the brick by gripping the edges of the brick itself. They have teeth or springs that adjust to the brick’s height, securely holding onto the space between the brick and the mortar.
- Choosing the Right Size: Measure the height of your bricks to select the appropriate size of brick clips, as they come in various sizes to accommodate different brick dimensions.
- Installation: Slide the top edge of the clip over the brick, then press down until the lower part snaps securely under the brick. This creates a stable hook or ledge for hanging items.
- Removal and Reuse: Brick clips are easily removable and reusable, making them ideal for temporary decorations or for renters who need a flexible solution.
- Versatility: Brick clips are suitable for both interior and exterior use. They can be moved and repositioned as needed, making them perfect for seasonal decorations or temporary displays.
- Weight Capacity: Like adhesive options, brick clips have weight limitations. Ensure the clips you select can support the weight of the object you wish to hang. Using multiple clips can distribute the weight more evenly for heavier items.
Magnetic Hangers
Magnetic hangers are a lesser-known but highly effective method for attaching items to certain types of brick walls, particularly those with embedded metal or when used in conjunction with metal mounts.
- Suitable Surfaces: This method requires a ferromagnetic component within or behind the brick surface to work, which might not be applicable in all situations. Test the brick area with a strong magnet to check for suitability.
- Applicability: This method is contingent on having a metal surface behind the brick, such as a metal lintel or embedded metal mesh, which is more common in older constructions or in specific architectural features.
- Installation: Magnetic hangers typically involve attaching a magnetic mount to the wall and then hanging the item from the mount. This method is ideal for lightweight items and offers the flexibility to reposition items without leaving any residue or marks.
- Considerations: The effectiveness of magnetic hangers greatly depends on the magnetic strength and the wall’s properties. They are best used for light decorations, photos, or small art pieces.
Into the brick or into the mortar when making holes?
When it comes to hanging items on a brick surface, homeowners and handymen are often divided over whether it’s better to drill holes in the brick itself or in the mortar between the bricks. Both approaches have their distinct advantages and disadvantages, which are important to consider based on the type of item being hung, the structural integrity of the wall, and aesthetic concerns.
Drilling into Brick
Pros:
- Strength and Stability: Brick is generally much harder than mortar and provides a stronger hold for heavy items. This makes it ideal for supporting substantial weight, such as large frames, TVs, or cabinets.
- Durability: Because bricks are made to withstand significant wear and tear, holes drilled into them tend to maintain their integrity over time better than those drilled into mortar.
Cons:
- Difficulty of Drilling: Brick is a very hard material, which makes drilling into it more challenging. This process requires a robust drill bit, typically a masonry bit, and a powerful drill. The effort and potential for damaging tools and wall are higher.
- Risk of Damage: Incorrectly drilling into brick can cause it to crack or split, leading to structural damage in the wall.
- Aesthetic Impact: Holes in bricks are more noticeable and can be considered unsightly, especially if the item is later removed and the holes are left exposed.
Drilling into Mortar
Pros:
- Ease of Drilling: Mortar is softer and more porous than brick, which makes it much easier to drill into. This means less strain on tools and a lower risk of user error during the drilling process.
- Less Risk to Structural Integrity: Drilling into mortar is generally less likely to cause structural damage to the brickwork, as mortar can be repaired or replaced more easily than brick.
- Simpler Repairs: Filling and matching mortar for repairs is usually straightforward, making it easier to cover up holes if items are removed or relocated.
Cons:
- Reduced Load Capacity: Mortar is not as strong as brick and may not hold heavier items securely. There’s a greater risk of the anchor pulling out under weight, which can lead to damage of both the mounted item and the wall.
- Durability Concerns: Mortar may degrade or crumble over time, especially in environments exposed to moisture or freeze-thaw cycles, potentially weakening the hold. It is not recommended for exterior use.
Invasive Hanging Methods (Permanent Solutions)
When it comes to hanging heavier items or ensuring a more permanent fixture on brick walls, invasive methods that involve altering the brick directly are often necessary. While more labor-intensive and permanent, these methods provide the durability and security needed for hanging larger artworks, shelves, and outdoor fixtures.
Drilling into Brick
Drilling into brick allows for the secure attachment of heavy items through the use of anchors and screws. This method is ideal for installations where maximum support is required.
Tools and Materials Needed:
- Power drill with a hammer function
- Masonry drill bits of the appropriate size
- Wall anchors (plastic or metal, depending on weight requirements)
- Screws
- Safety glasses and gloves
Step-by-Step Guide:
- Select the Right Drill Bit: Use a masonry bit slightly smaller than the diameter of the wall anchor you plan to use. This ensures a tight fit for the anchor.
- Mark the Drilling Spot: Measure and mark where you want to drill on the brick, not the mortar, as brick provides a more secure hold.
- Prepare the Drill: Set your drill to hammer mode to efficiently penetrate the brick.
- Drill the Hole: Start drilling at a slow speed to establish the hole, then increase speed. Apply steady pressure. Drill to the depth needed for your anchor.
- Insert the Anchor: Clean out the dust from the hole with a can of compressed air or a vacuum. Then, tap the anchor into the hole until it’s flush with the brick surface.
- Attach Your Item: Screw the item or its mounting bracket into the anchor, ensuring it is securely fastened.
Using Masonry Nails
For lighter objects, masonry nails can provide a simpler solution. These nails are designed to be driven directly into brick and provide a sturdy hold for items that do not require the support of an anchor.
Tools and Materials Needed:
- Masonry nails
- Hammer
- Safety glasses and gloves
When and How to Use:
- Select Appropriate Nails: Choose masonry nails that are long enough to penetrate the brick and provide a secure hold. The length will depend on the thickness of the object you’re hanging.
- Position Your Item: Hold your item or its mounting hardware against the wall, marking where the nails will go. Ensure these spots are on the brick itself.
- Hammer the Nail: Place the tip of the masonry nail on your marked spot. With safety glasses on, carefully hammer the nail into the brick until it is secure, but avoid over-hammering which can damage the brick or nail.
Safety Precautions:
- Always wear safety glasses to protect your eyes from flying debris.
- Gloves can protect your hands from sharp edges and reduce vibration from the hammer or drill.
- Ensure the area behind the wall is clear of electrical wiring and plumbing before drilling or hammering.
Special Considerations for Exterior Brick
Hanging decorations, lights, or other items on exterior brick walls enhances your home’s curb appeal and allows for creative expression in outdoor spaces. However, exterior brick is exposed to the elements, meaning any hardware used must withstand conditions such as rain, snow, sunlight, and temperature fluctuations.
Protecting Hanging Hardware from Rust and Corrosion
- Use Galvanized or Stainless Steel Hardware: When selecting screws, nails, or anchors for outdoor use, opt for galvanized or stainless steel options. These materials are treated to resist rust and corrosion, ensuring the longevity of your installation.
- Apply Protective Coatings: If the ideal material for your project is prone to rust, consider applying a protective coating. Rust-inhibiting paint or a clear coat can provide an extra layer of protection against moisture and oxidation.
- Regular Maintenance: Periodically check your outdoor hanging hardware for signs of wear or rust. Early detection can prevent damage from spreading and prolong the life of the hardware. Cleaning the hardware and applying a new layer of protective coating as needed can also help.
Selecting Weather-Resistant Materials for Outdoor Decorations
- Choose Durable Decor Materials: For items that will be exposed to outdoor conditions, materials like metal (with proper rust protection), weather-resistant woods (such as teak, cedar, or redwood), heavy-duty plastics, and ceramics are ideal choices. These materials are designed to withstand outdoor conditions without significant degradation.
- Consider the Impact of Sunlight: UV-resistant materials and paints can prevent fading and wear from prolonged exposure to sunlight. Look for decorations specifically labeled as UV-resistant or consider applying a UV-resistant coating to your outdoor items.
- Wind Considerations: In areas prone to high winds, ensure that decorations are securely fastened and that hanging items like chimes or mobiles are designed to endure gusts. Weighted bases and secure mounting can prevent damage to both the decoration and the brick wall.
- Adaptability to Temperature Changes: Materials that can withstand temperature fluctuations without cracking, warping, or otherwise degrading are essential for outdoor use. This is particularly important in climates that experience wide temperature ranges throughout the year.
How to Fill Holes in Brick
Over time or after changing decorations, you may find yourself with holes in your brick that need filling. Here’s how to select a suitable filler material and fill holes effectively.
Choosing the Right Filler Material
- Mortar Mix: A mortar mix is often the best choice for filling holes in brick because it closely matches the brick’s appearance and durability. Select a color that closely resembles your brickwork for a seamless repair.
- Epoxy Fillers: Epoxy fillers designed for masonry can be effective for a stronger bond, especially in areas bearing weight or exposed to high traffic. They are also available in various colors to match your brick.
- Caulk: Silicone or acrylic caulk designed for masonry is a flexible option for smaller holes, particularly in areas where slight movement might occur, such as around windows or doors.
Step-by-Step Instructions on Filling Holes
- Clean the Hole: Remove any loose debris or dust from the hole using a brush or vacuum. The area should be dry and clean for the filler to adhere properly.
- Prepare the Filler: Mix your mortar or prepare your chosen filler according to the manufacturer’s instructions. For epoxy fillers, ensure the components are mixed thoroughly.
- Apply the Filler: Using a pointing trowel or putty knife, press the filler into the hole, ensuring it is packed tightly and completely fills the space. Overfill the hole slightly to account for any shrinkage as the filler dries.
- Smooth the Surface: Use a damp sponge or your tool to smooth the filler, blending it into the surrounding brick and mortar. This will help the repair blend in with the rest of the wall.
- Curing Time: Allow the filler to dry and cure as the manufacturer recommends. Avoid disturbing the area during this time.
- Color Match: If necessary, once the filler is fully cured, you can apply a masonry stain or paint to better match the surrounding brickwork.
Alternative Hanging Options
For those who prefer not to drill into their brick walls or are looking for temporary and flexible decorating solutions, there are several alternative hanging options that can still enhance your space.
Shelving Solutions
- Tension Rods: Tension rods can be used to hang lightweight items or fabric decorations without drilling in spaces between walls or window recesses.
- Freestanding Shelves: Utilizing freestanding shelving units allows you to display decor, books, and other items against a brick wall without having to attach anything directly to the wall itself.
Art Rails or Picture Ledges
- Installing Above the Brick: By installing picture rails or ledges on the wall area above the brick (on drywall or another less durable surface), you can hang artwork and photos with flexibility. This method allows for easy changes and adjustments without impacting the brick.
- Use of Rail Systems: Some rail systems can be installed at the ceiling level, from which wires or rods hang down to support artwork, providing a versatile and adjustable display method.
Use of Furniture and Decorative Elements
- Strategically Placed Tall Furniture: Tall furniture pieces like bookcases or standing mirrors can be placed against brick walls to serve as a backdrop for hanging or leaning smaller artworks and decorative items.
- Standing Frames and Easels: For a dynamic and easily changeable display, use standing frames, easels, or other supportive structures to showcase art in front of brick walls without the need for hanging.
More How To Articles
How to Hang Curtains
How to Choose Siding
How to Grow a Salsa Garden or a Chimichurri Garden
How to Turn a Shed Into a Tiny Home
How to Remove Lint


